How to visualize Fermi-surface in CINEMAS
CINEMAS can visualize Fermi-surface in its component CINEMAS-view.
Fermi-surface calculation can be performed using CINEMAS, and then CINEMAS-view can display 3D Fermi-surface automatically from VASP output files.
Alternatively, a folder containing VASP files of a Fermi-surface calculation can be imported to CINEMAS, and then 3D Fermi-surface can be visualized in CINEMAS-view.
Examples of Nonmagnetic Al
Fig. 159 shows a workflow loaded in CINEMAS. This calculation could be performed within CINEMAS, or imported to CINEMAS.

Fig. 159 Workflow displaying a Fermi-surface calculation for Al-Nonmagnetic in CASCADE.
Once can switch to CINEMAS-view by clicking the icon on the workflow or directly as highlighted in Fig. 160

Fig. 160 Switch to CINEMAS-view to view Fermi-surface there.
Left pan on CINEMAS-view, shows a tree of workflows and list of files supported by CINEMAS-view therein.
Visualization need not to be set for POSCAR necessarily for Fermi-surface visualization.
Any file(POSCAR/CONTCAR/PARCHG/LOCPOT/ELFCAR/CHGCAR) can be visualized from the workflow, Al-Nonmagnetic in this example(See Fig. 161).
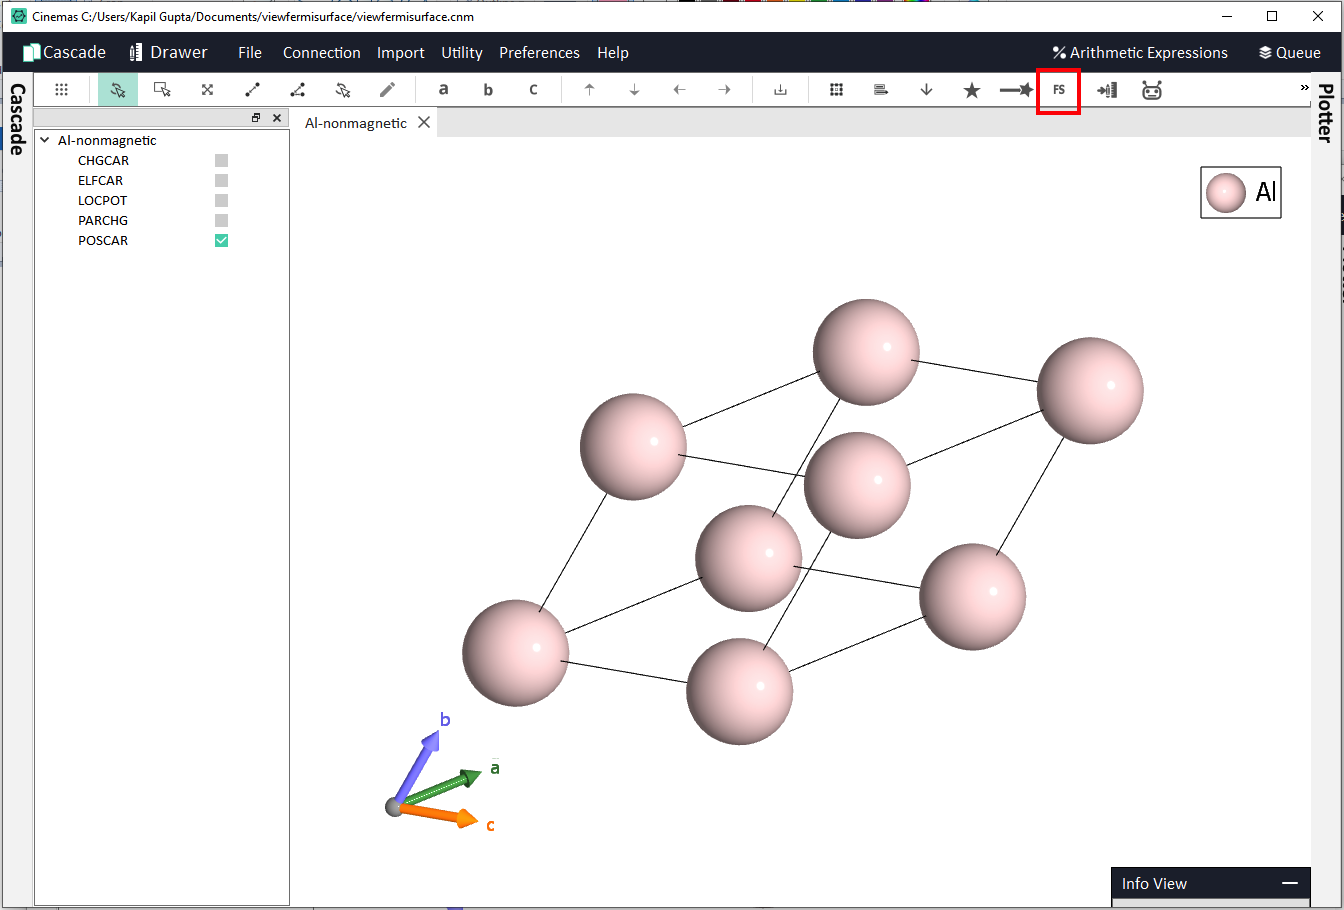
Fig. 161 CINEMAS-view displaying the structure from the workflow Al-Nonmagnetic from CASCADE.
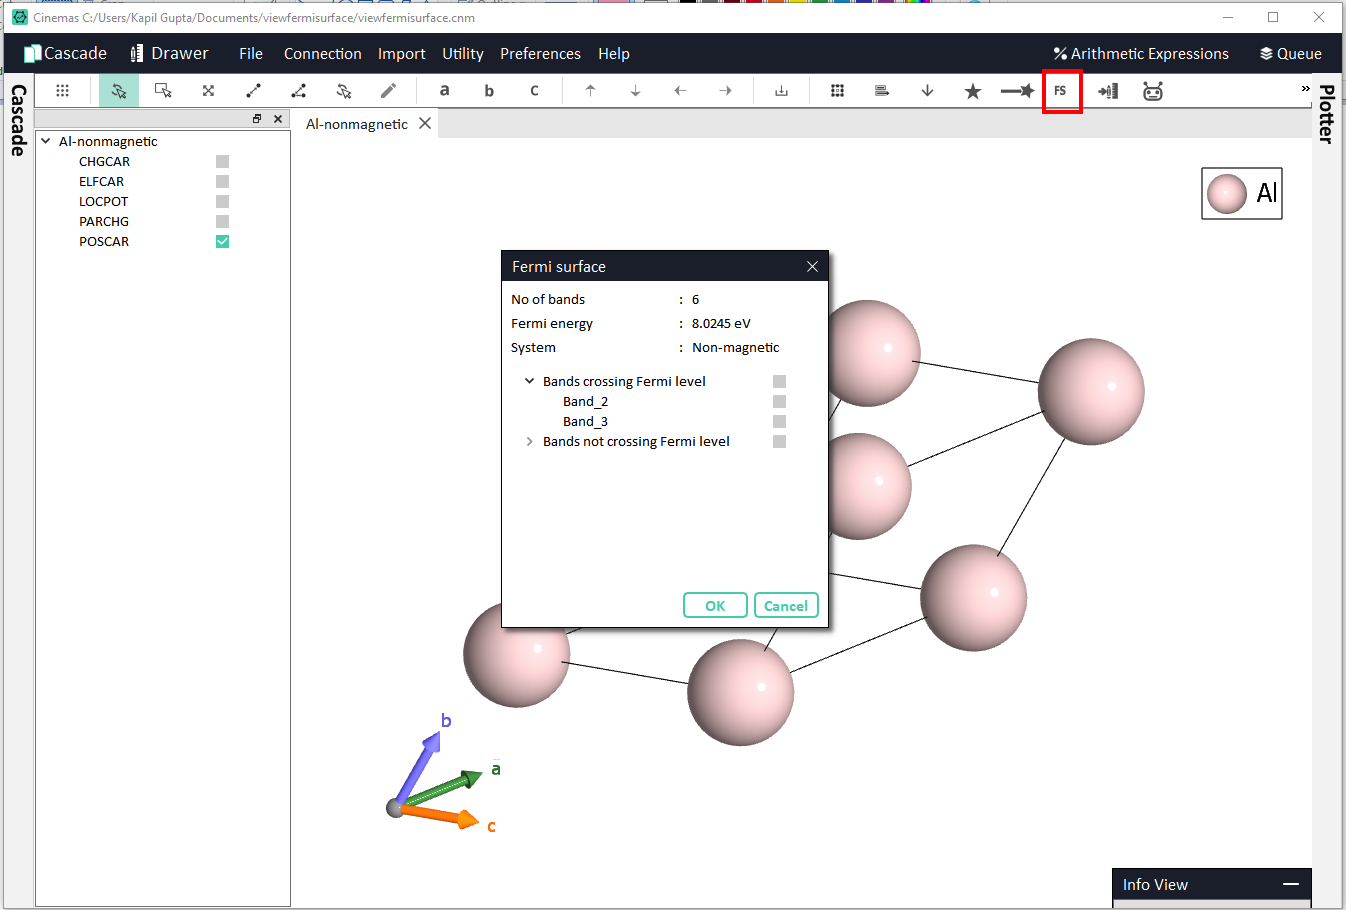
Fig. 162 Invoking Fermi-surface workspace from the CINEMAS-view toolbar.
Invoking Fermi-surface workspace, prompts a window as shown in Fig. 162. This displays a few informations about the system, in this example Al-Nonmagnetic:
No. of band.
The value of Fermi-energy.
Type of system: Magnetic or Non-Magnetic.
Bands crossing or NOT crossing Fermi-level, along with respective band indices
Fig. 163 shows how different options can be selected to visualize Fermi-surface.
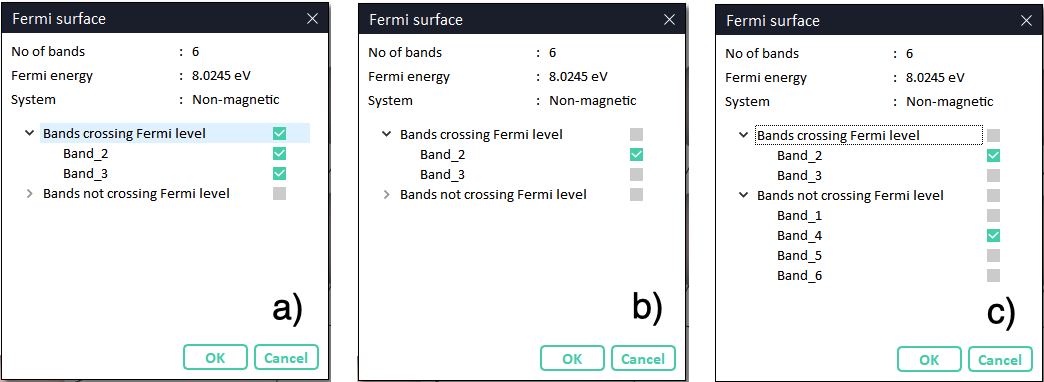
Fig. 163 Different ways to select bands to visualize Fermi-surface for.
For this example, options as shown in Fig. 163-(a) are selected.
By clicking the OK button, CINEMAS-view switches to Fermi-surface visualization, as shown in the Fig. 164.
Since, options as shown in the Fig. 163-(a) were selected with two bands #2 and #3 crossing the Fermi-level.
First tab displays 3D Fermi-surface for band #2.
Second tab displays 3D Fermi-surface for band #3.
Third tab displays a merged view of band #2 and #3 together(see Fig. 164).
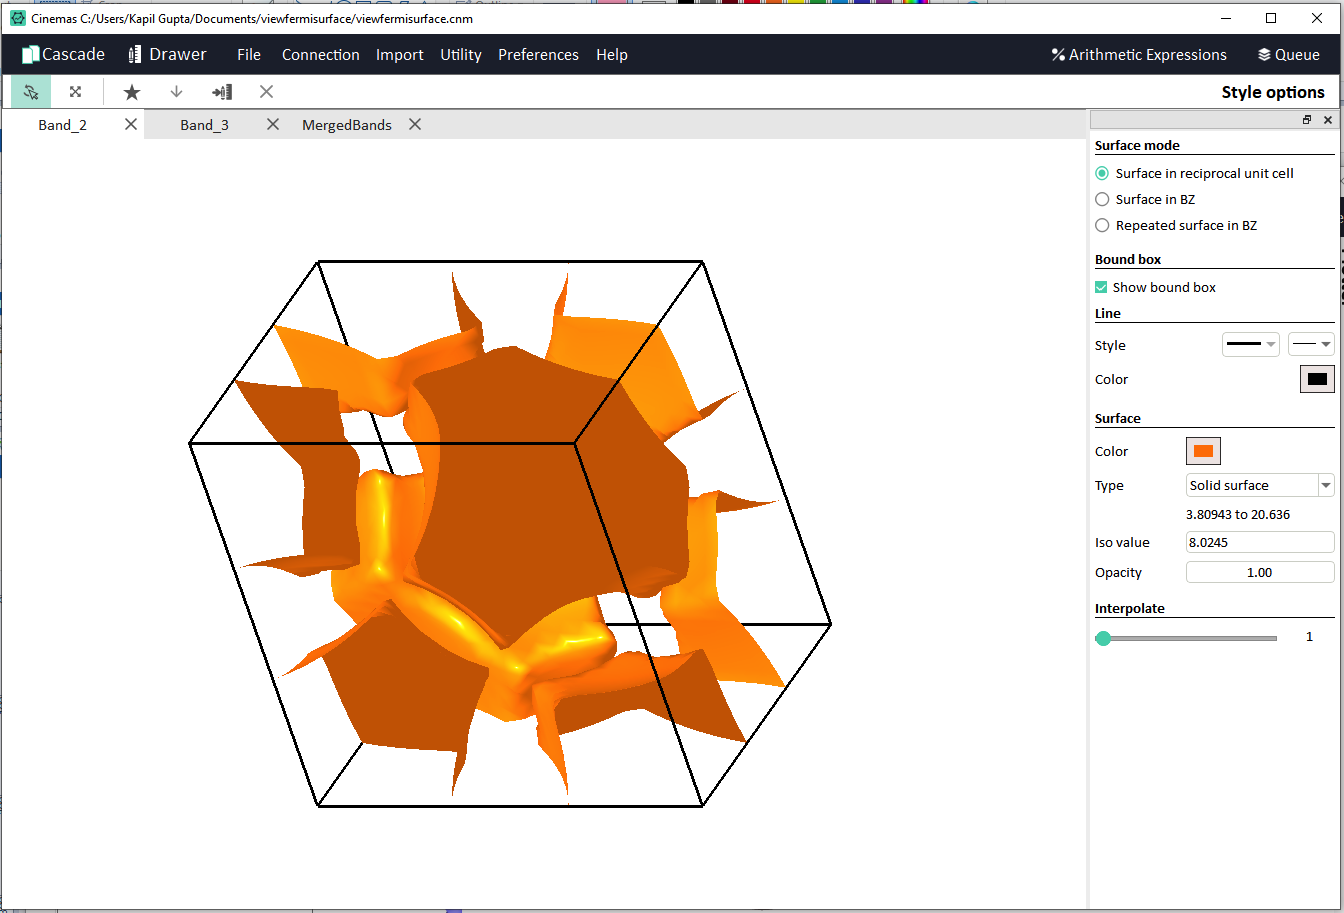
Fig. 164 Fermi-surface for individual band #2.
On the right side, from Style Options, view-mode can be changed, or different style-settings can be applied.
For individual bands, default mode of visualization is Surface in reciprocal unitcell (Fig. 164).
Mode can be changed to Surface in BZ (Fig. 165). BZ stands for Brillouin Zone.
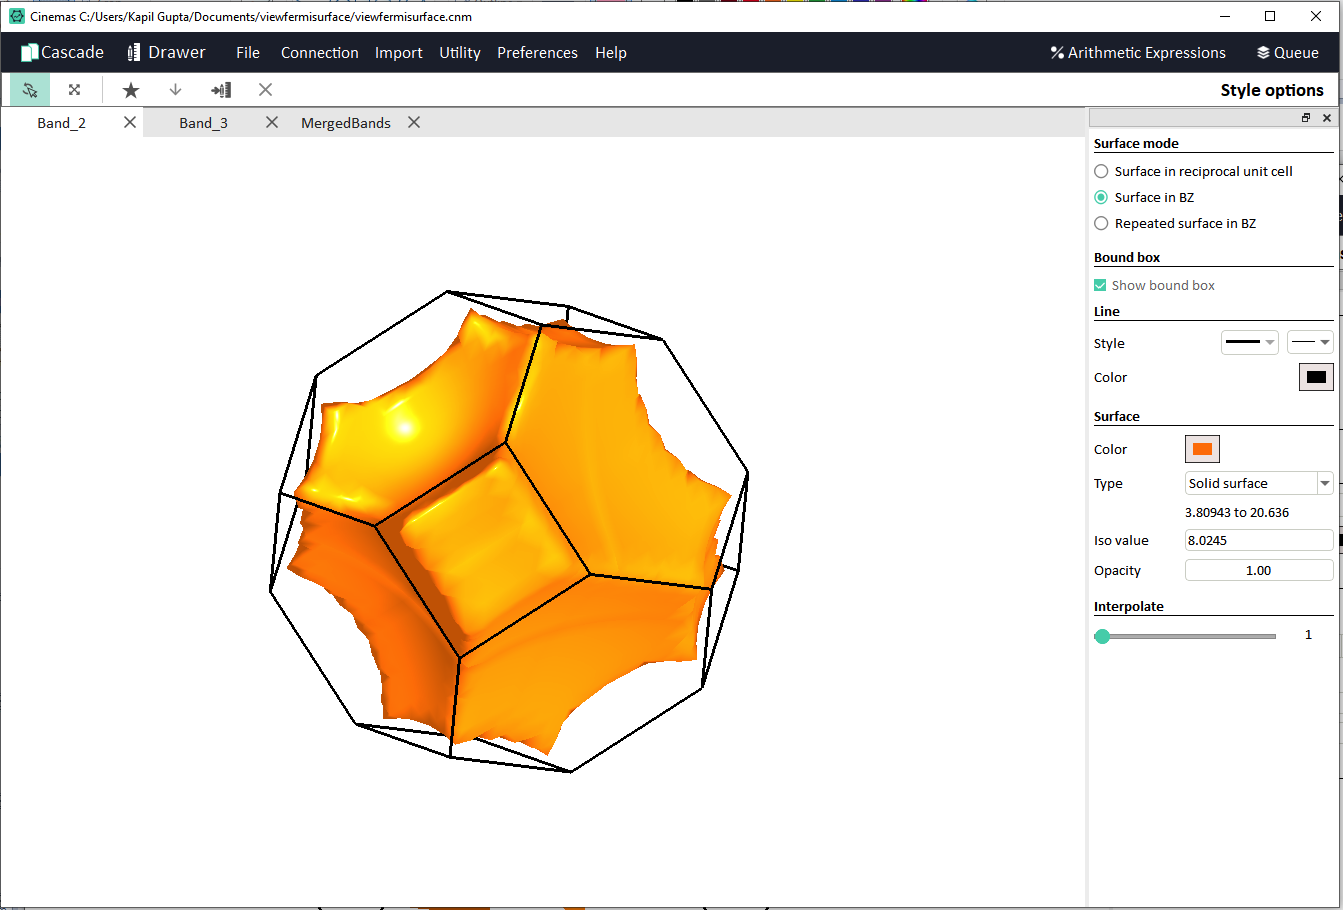
Fig. 165 Fermi-surface for individual band #2, in surface in BZ mode.
Another mode is Repeated surface in BZ (Fig. 166).
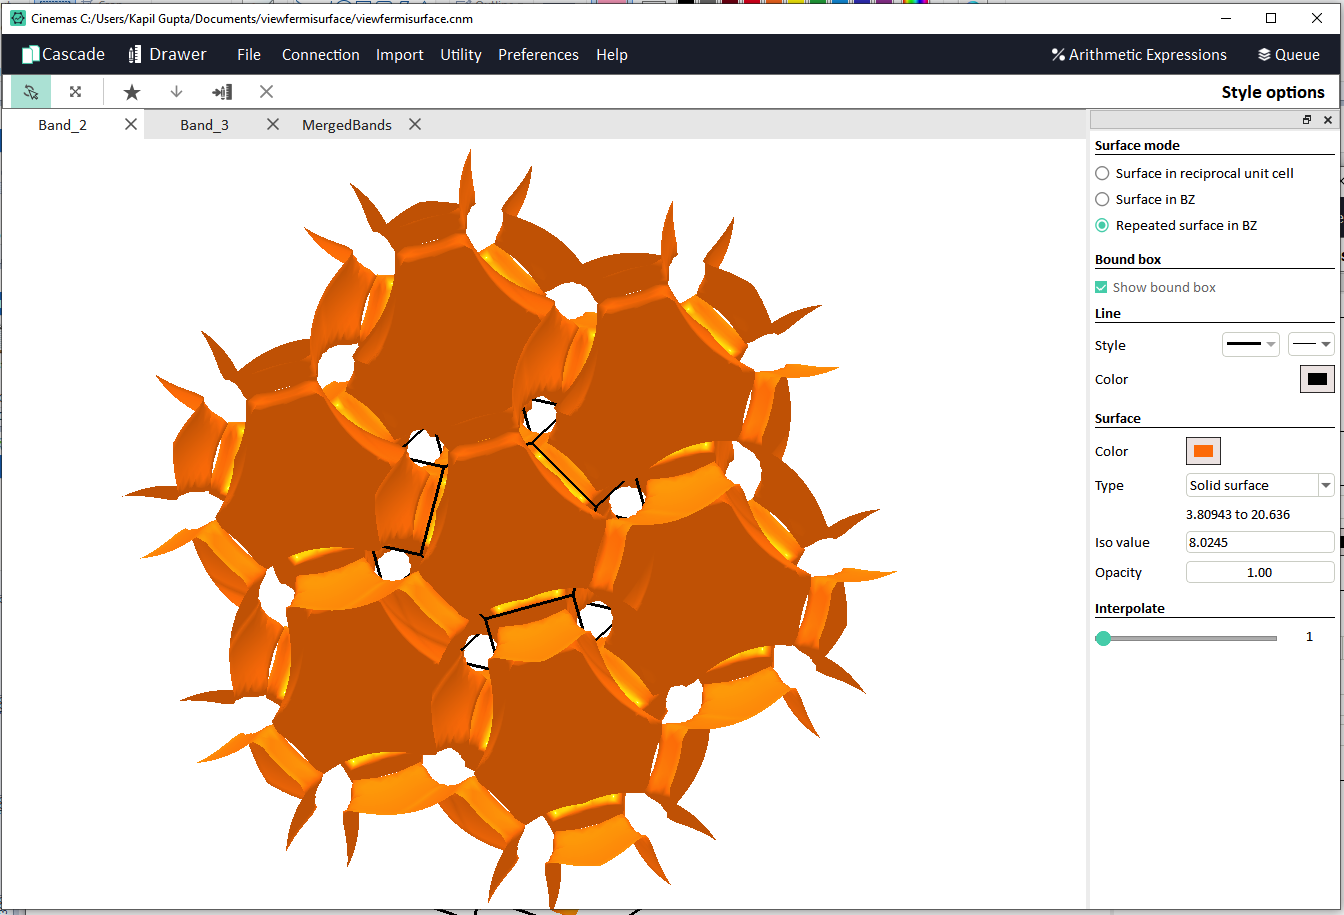
Fig. 166 Fermi-surface for individual band #2, in Repeated surface in BZ mode.
Fig. 167 displays Fermi-surface for band #3, and modes or style-settings can be changed from Style Options.
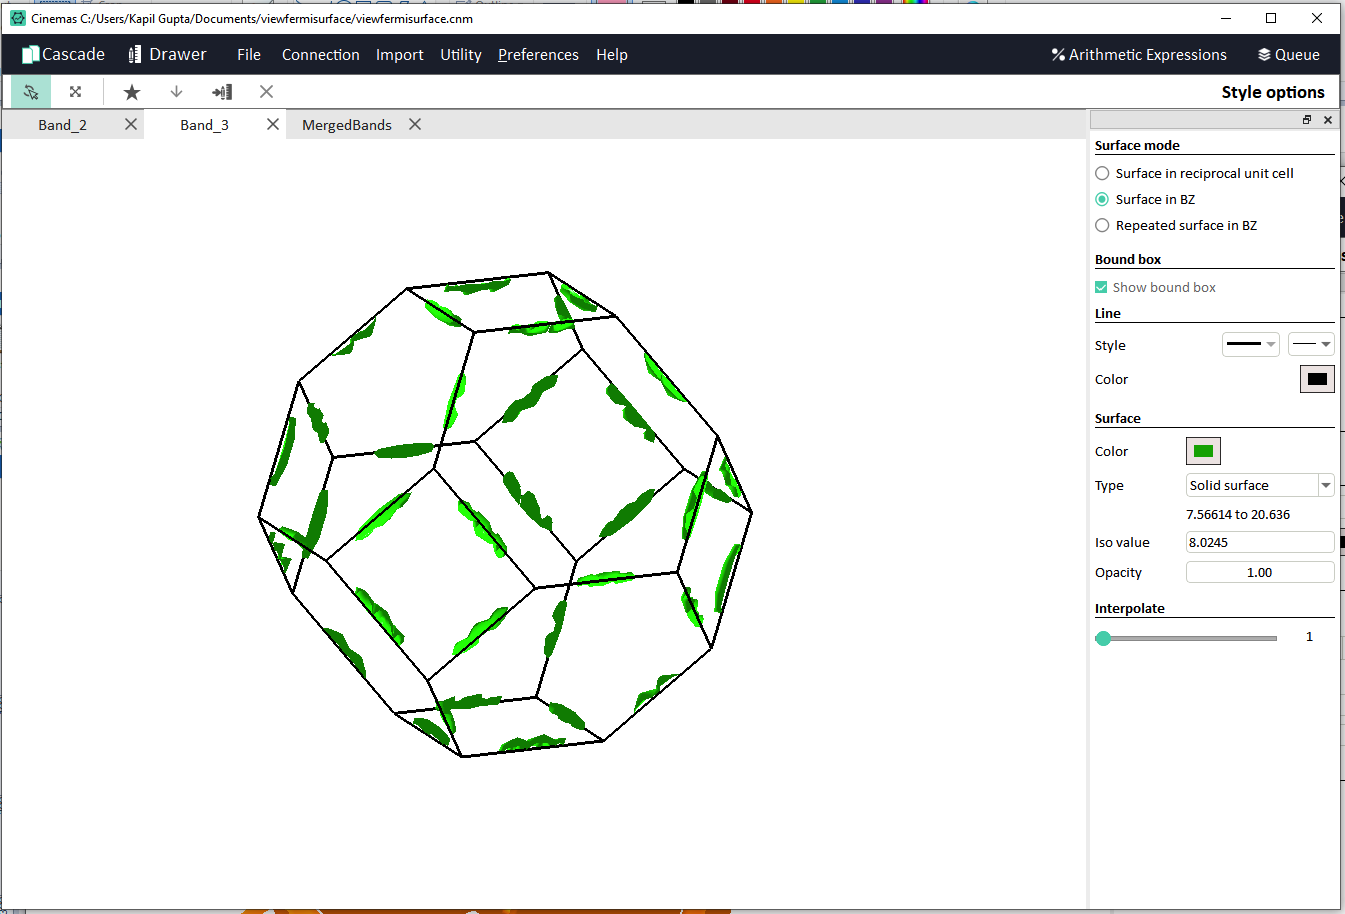
Fig. 167 Fermi-surface for individual band #3.
Fig. 168 displays merged view of Fermi-surfaces for band #2, and #3.
Multiple, Line/Color properties can be changed/applied from the Style Options as shown on the right side of the Fermi-surface visualizer.
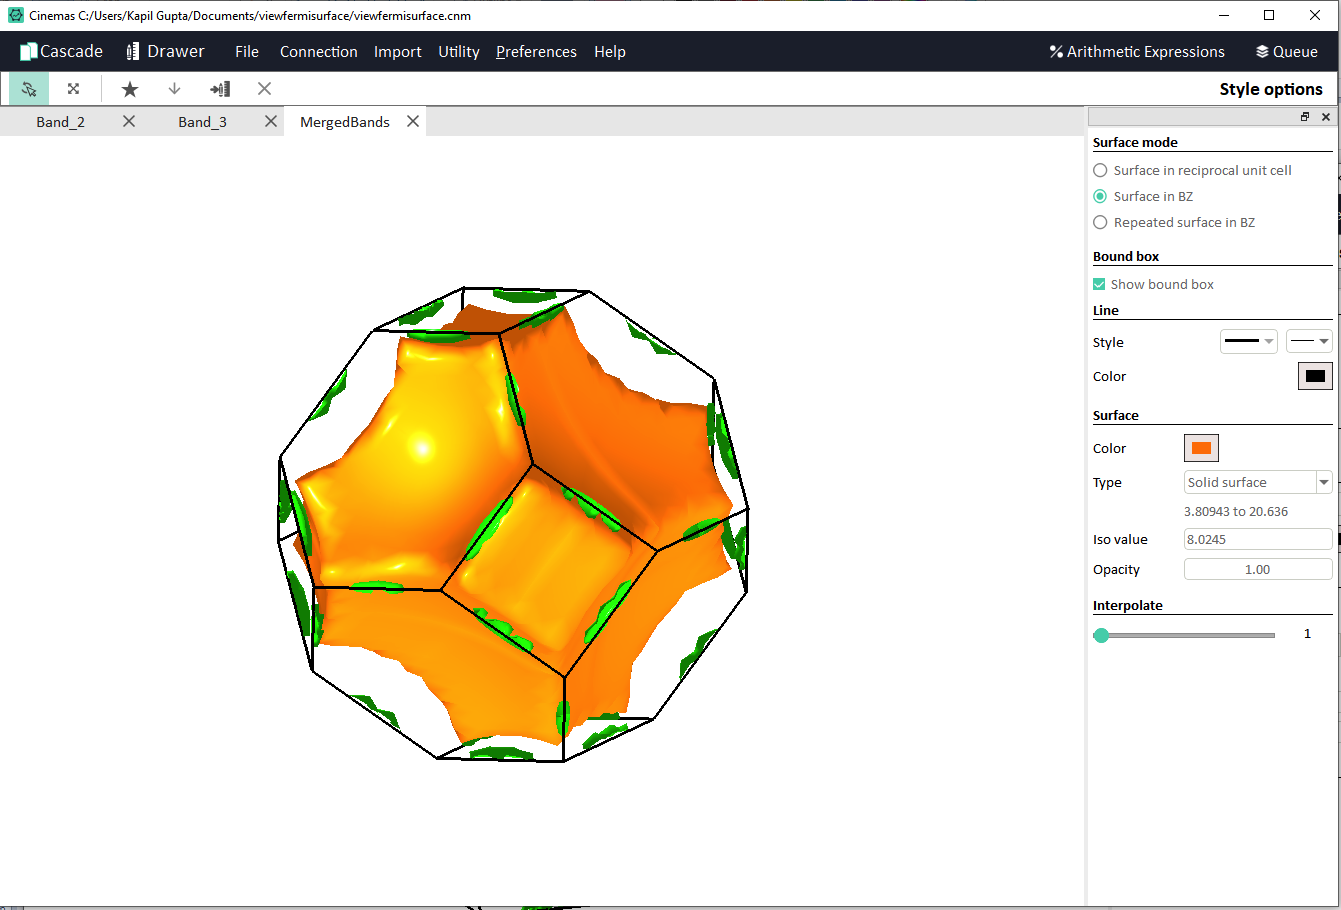
Fig. 168 Merged view of Fermi-surfaces for band #2, and #3.
For example, for band #2, and #3 Fermi surface can be shown as wired type instead of solid type of surface(see Fig. 169 and Fig. 170).
Importantly, from Style Options, Interpolate slider can be used to interpolate Fermi-surface data points, to make surface look smoother.
CINEMAS supports interplolation upto 6X.
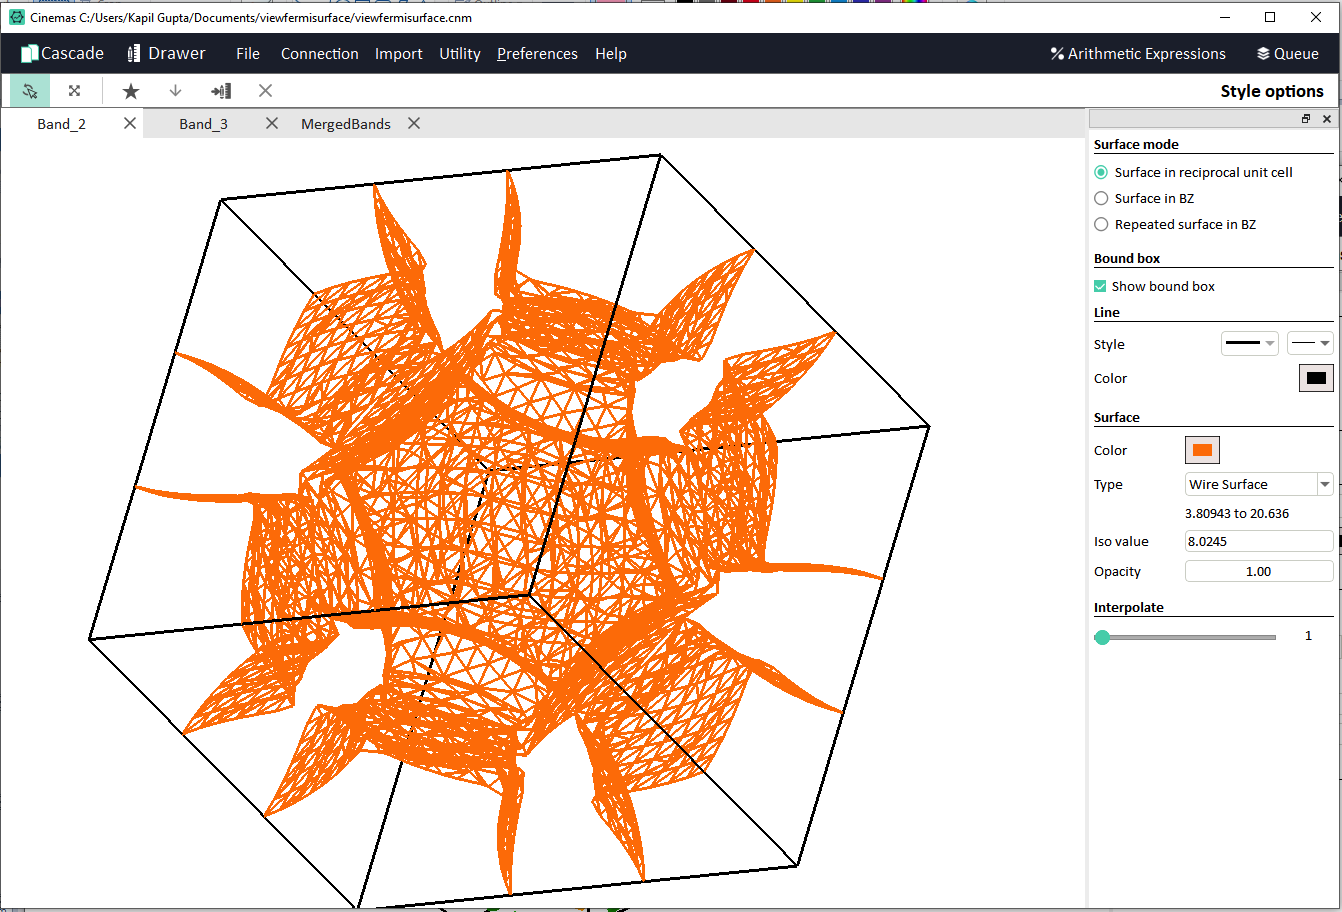
Fig. 169 Displaying Fermi-surface of wired-surface type, for individual band #2.
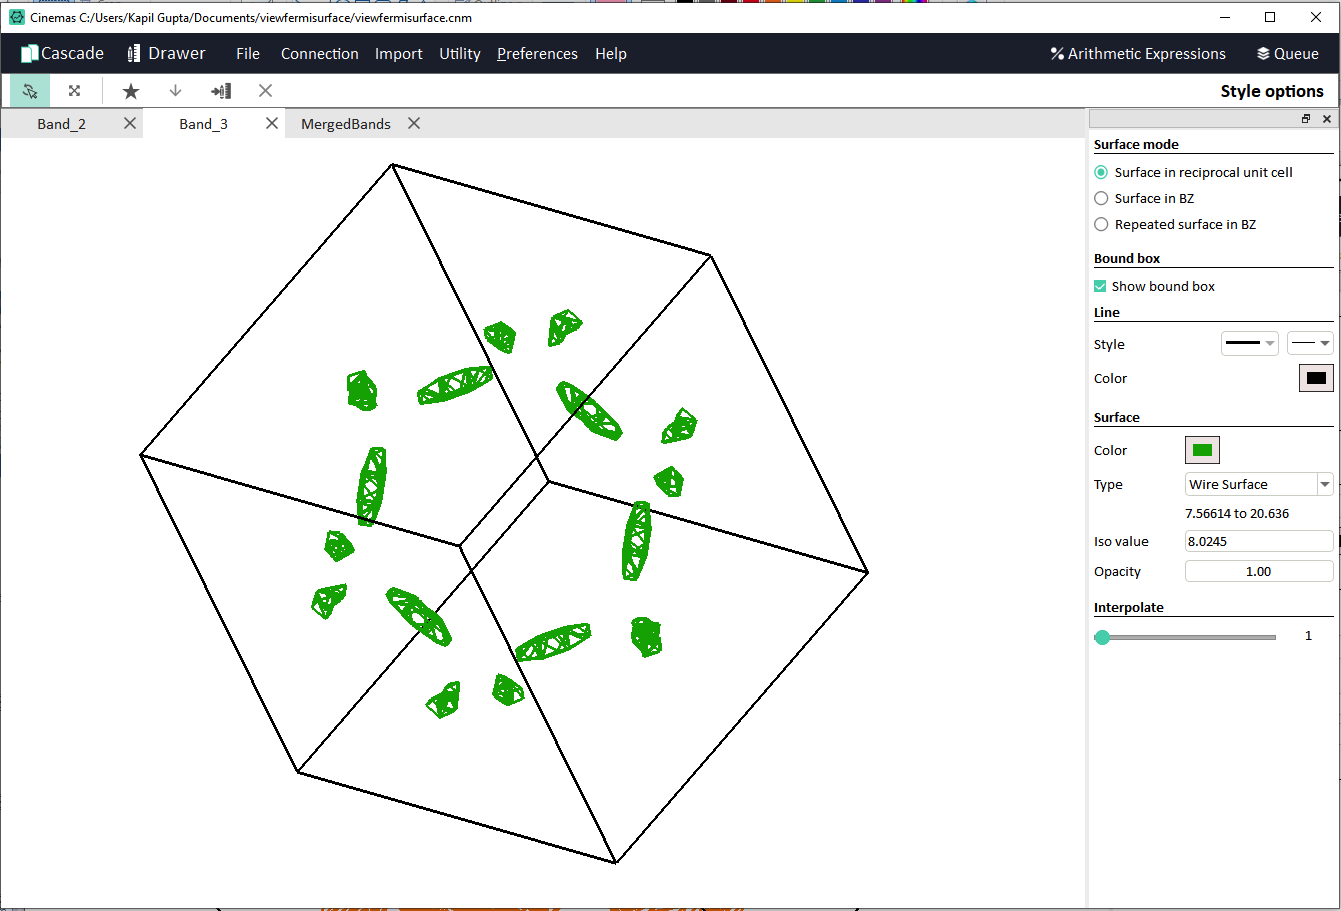
Fig. 170 Displaying Fermi-surface of wired-surface type, for individual band #3.
Finally, by a single click on the button
 , graphics from the Fermi-surface visualizer can be exported to CINEMAS-draw to create a figure of publication-standard.
Graphics from the screen as shown in the Fig. 168 is exported to CINEMAS-draw as shown in the Fig. 171.
Text-box and the effects are added additionally.
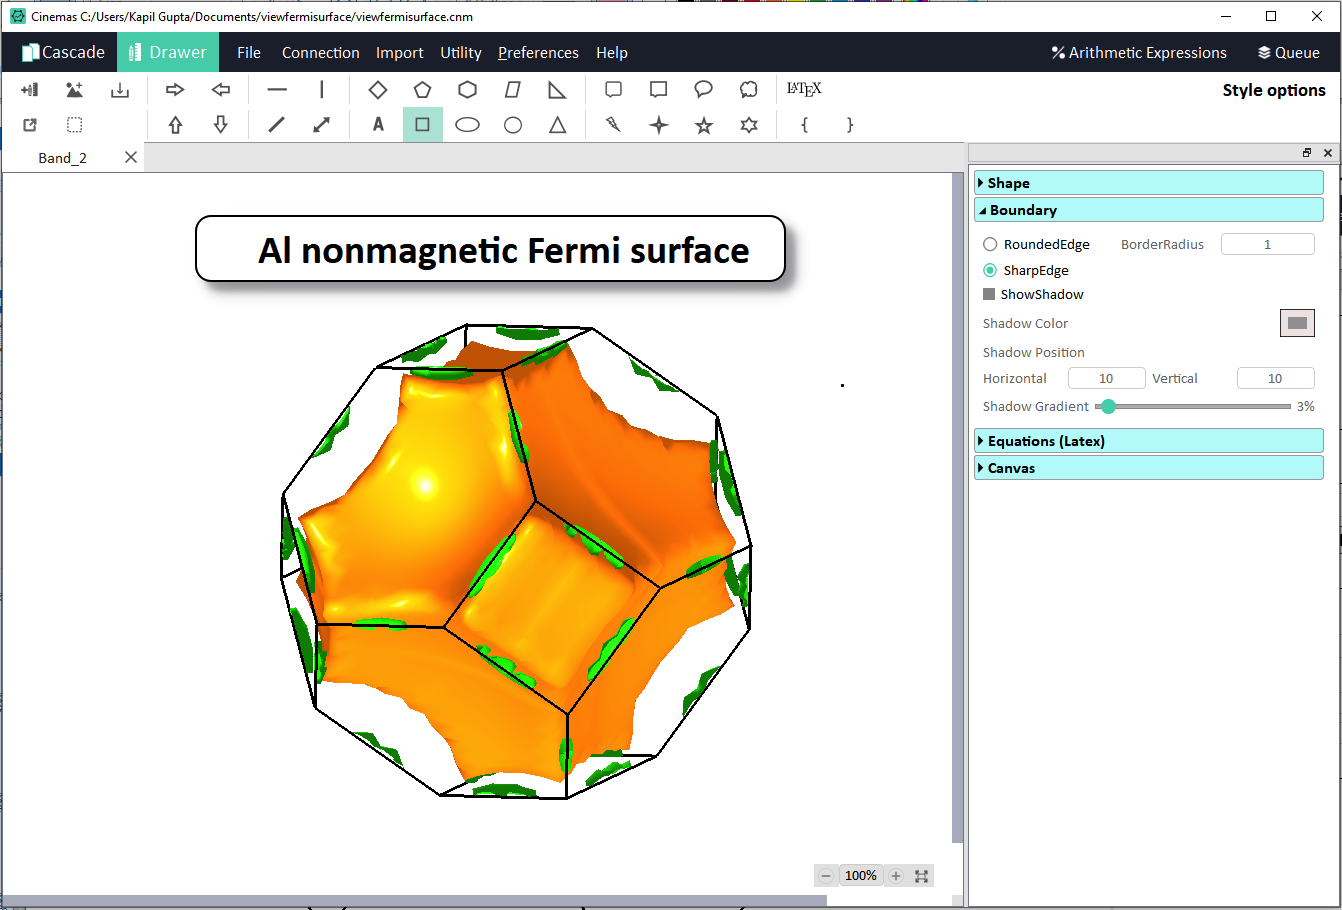
Fig. 171 One-click export of graphics from Fermi-surface viewer to CINEMAS-draw to futher prepare figure of publication-standards. Text box is added separately.